Kris and I are getting closer to leaving on our first road trip in Dutchie (our 2012 Fleetwood Jamboree )! One of the last things (but we feel important) to do before departure was installing a Tire Pressure Monitor System or TPMS.
We have heard so many stories about blown out tires we decided the value of a good Tire Pressure Monitoring System far outweighs the cost. With a TPMS installed on our RV we should be able to pull over at the first sign of trouble, hopefully before any damage is done!
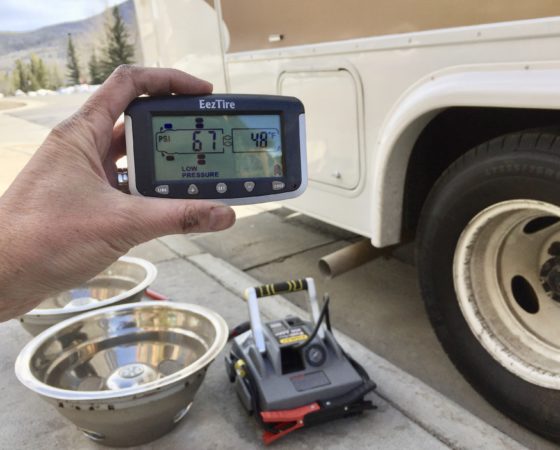
We ordered the EEZTIRE T515 with 6 anti theft sensors. The system comes with a screen that can keep track of 22 wheels (up to 210 psi ) and the sensors have replaceable batteries. This means the system should never become obsolete as long as the CR1632 cell battery is available. The system monitor has its own rechargeable battery pack that can be used as a handheld wireless tire pressure gauge when you walk around your rig.
Installation
Installation of the sensors went fairly easily. The most difficult part was reaching the tire valve stem, especially with a dually. Tire valve extensions are not recommended in combination with the sensors but I’m going to use them when inflating my tires next time at the gas station. My hands are still bruised from trying to reach the tire valve stems trough the small holes in our rims!
I started with setting the system alarm parameters for each sensor. For each tire you set a high pressure alarm and a low pressure alarm. Number each sensor so later you know which sensor to use on what tire (a sticker sheet with numbers is included).
After setting the parameters you take the monitor to your vehicle and push CODE for 3 seconds – until you hear the beep. At this time you will see all 22 tires on the monitor screen and the right front tire should be flashing. Use the + or – keys to scroll to the tire you want to set up. The tire you are programming the sensor to should be flashing on the monitor. Screw the sensor on the valve stem and hold the monitor close to the sensor just below the SET button. Turn away from the other sensors so their signals don’t interfere with your programming. You should see FFF FFF on the screen, but if the monitor shows a series of numbers and letters don’t worry these are from factory testing. Press and release the CODE button; you should see the numbers on the screen change.
Once all the sensors are programmed press the CODE button and hold for about 6 seconds, until you hear a long beep. Your monitor screen should now look like your rig configuration.
Anti Theft
The Ani Theft case that goes around the sensor doesn’t really work for our set up. You need a special wrench (included) to install the sensor, but installing the sensor with the wrench on the inside tire of the dually is almost impossible. I decided to use the sensors without the anti theft caps.
Winter storage
It’s a good idea to remove the sensors and monitor from your vehicle if parked for an extended time, especially in cold weather. The system needs to be stored in a warm location. Mark each sensors’ wheel position or store them in an egg carton so they can be replaced in the same wheel position to avoid having to do a new set up. Sensors use minimal power when they have no pressure on them.![]()
See ya on the road!
Stefan